Adding and managing clients
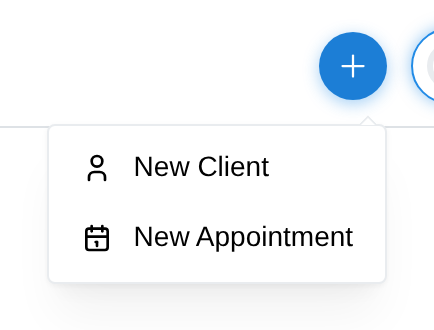
You can add clients to your practice at any time. Every client type — adult, minor, couple or family, or therapy group — starts from the same place: the + button in the top bar.
This guide covers creating each client type and managing your client list:
- Adding an individual client
- Adding a minor client
- Adding a couple or family
- Sending intake paperwork as you create
- Finding and managing clients
For the Group type — a group-therapy roster of independent clients — see Group therapy.
Adding an individual client
To add a client:
- Click + in the top bar (available on any page) and choose New Client
- The Clients page also has its own New Client button
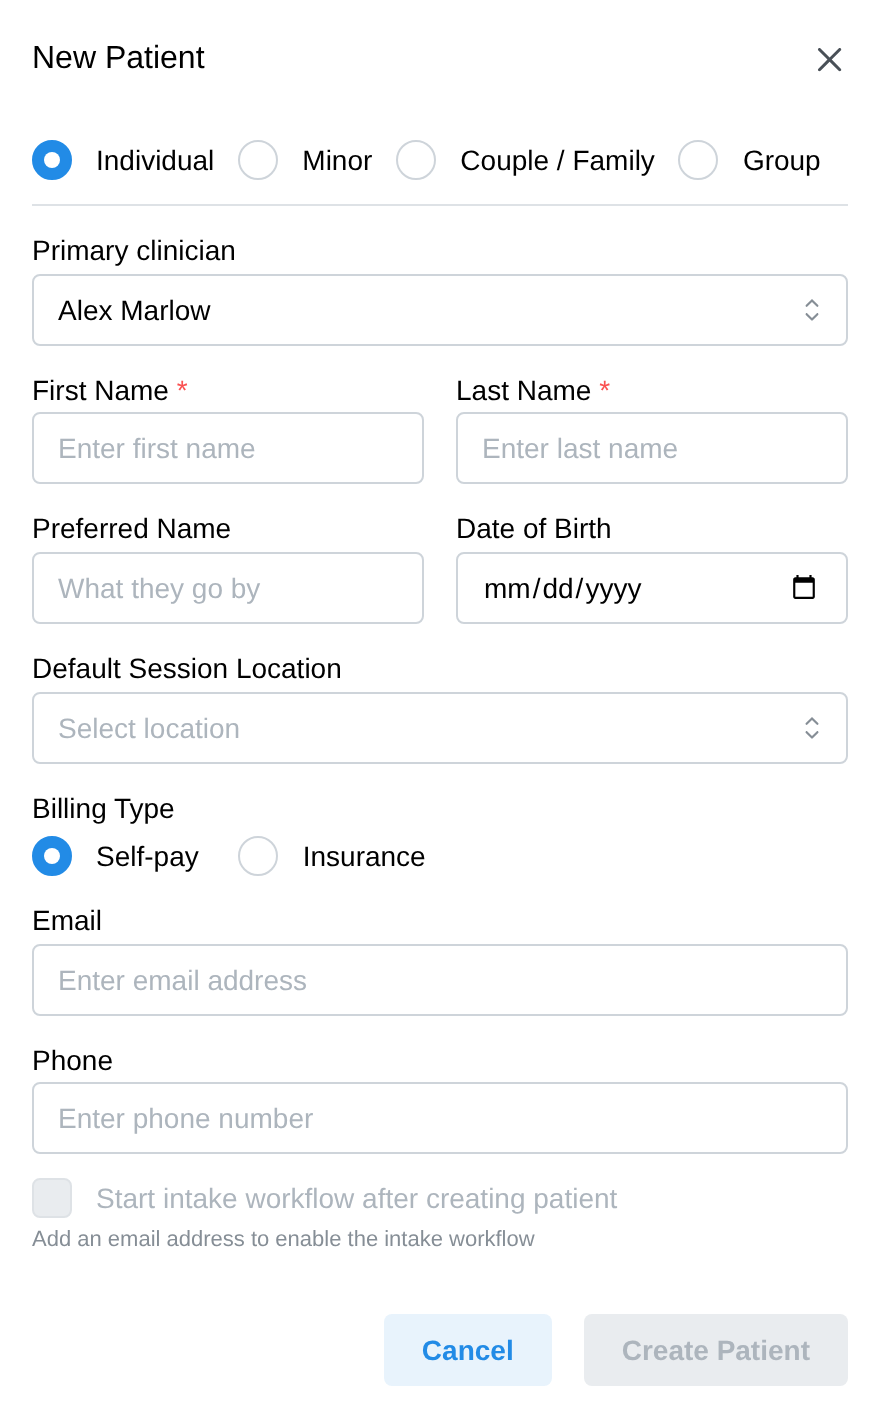
- Leave the client type on Individual
- Enter the client's first and last name (the only required fields), and as much of the rest as you have: Preferred Name ("what they go by"), Date of Birth, Email, Phone, and a Default Session Location if your practice has more than one
- Pick the Billing Type — Self-pay or Insurance
- Self-pay is ready to bill immediately; for insurance you'll add the coverage details afterward on the client's Payment & Insurance tab
- Leave Start intake workflow after creating patient checked to send paperwork right away — see below
- Click Create Patient
The new client is assigned to you as their clinician, so they appear on your My Clients list; hand them to a colleague later with Change Provider (below).
Creating a client sends no emails by itself — welcome and portal emails go out only through the intake workflow. And if you type an email that's already on another client, an orange warning appears — "This email is already registered to another patient" — and blocks the save. That's your duplicate check: search the Clients page first if you're unsure whether someone already exists.
Adding a minor client
To add a child or teen whose paperwork and billing go through a parent or guardian:
- Click + in the top bar and choose New Client
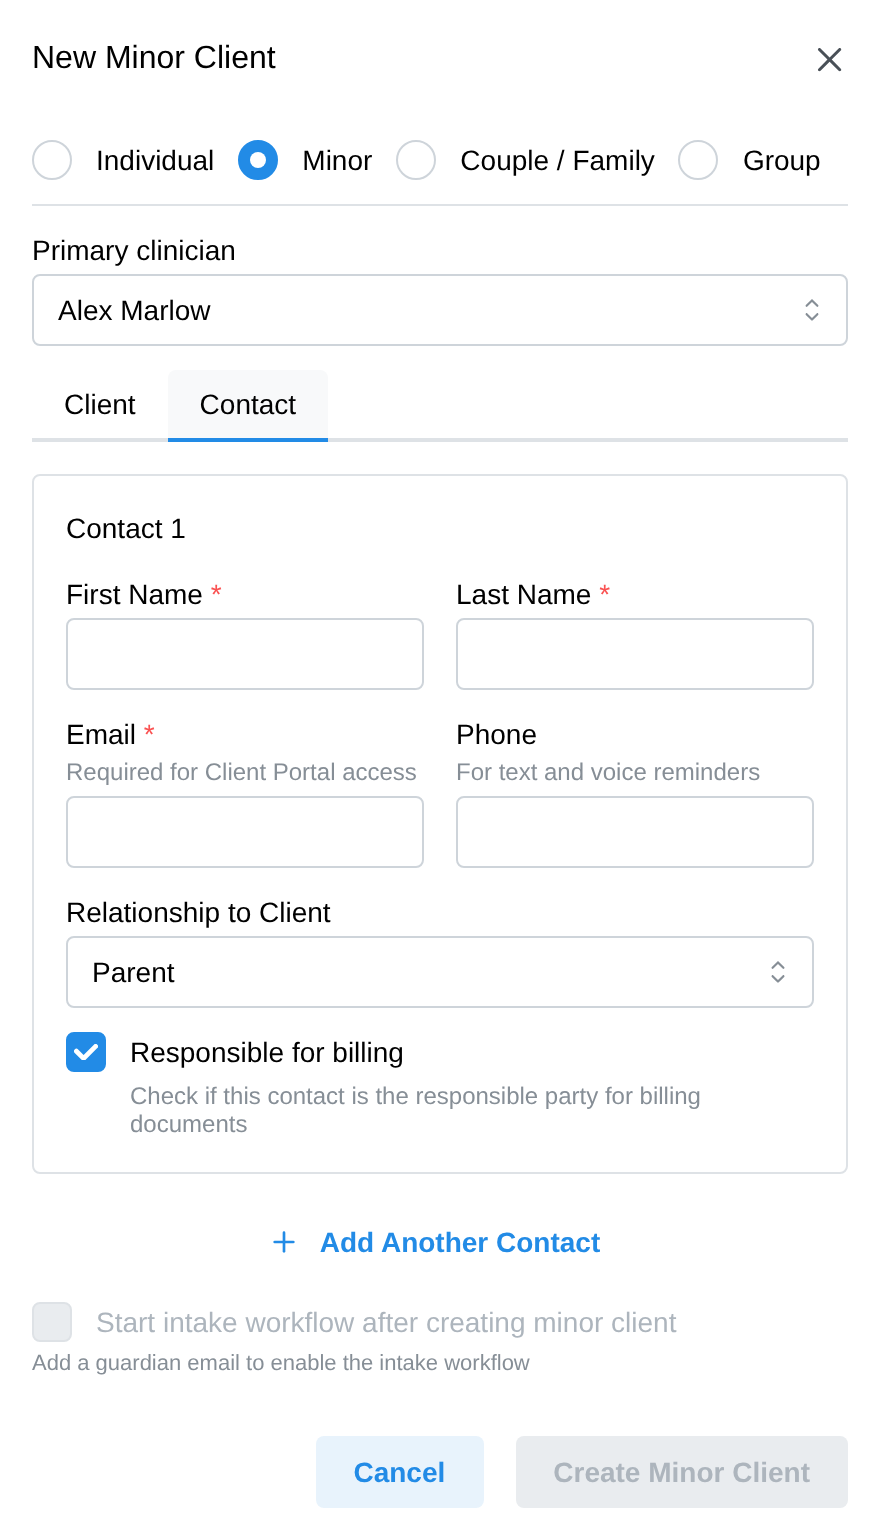
- Choose the Minor type — the form splits into two tabs
- On the Client tab, enter the minor's name, date of birth, and billing type
- Their own email/phone are optional and deliberately separate: "Only add email or phone if the minor has their own, separate from their parent or guardian"
- On the Contact tab, add at least one parent/guardian with first name, last name, and
email (the email is what gets portal access)
- Add their phone, pick the Relationship to Client, and use Add Another Contact for a second parent
- One contact is always marked Responsible for billing — bills go to them, never to the child
- Click Create Minor Client
The guardian handles paperwork and billing through their own portal login — see Minor clients for how consent, intakes, and portal access work for families.
Adding a couple or family
To create a couple or family that's seen together:
- Click + in the top bar and choose New Client
- Choose Couple / Family
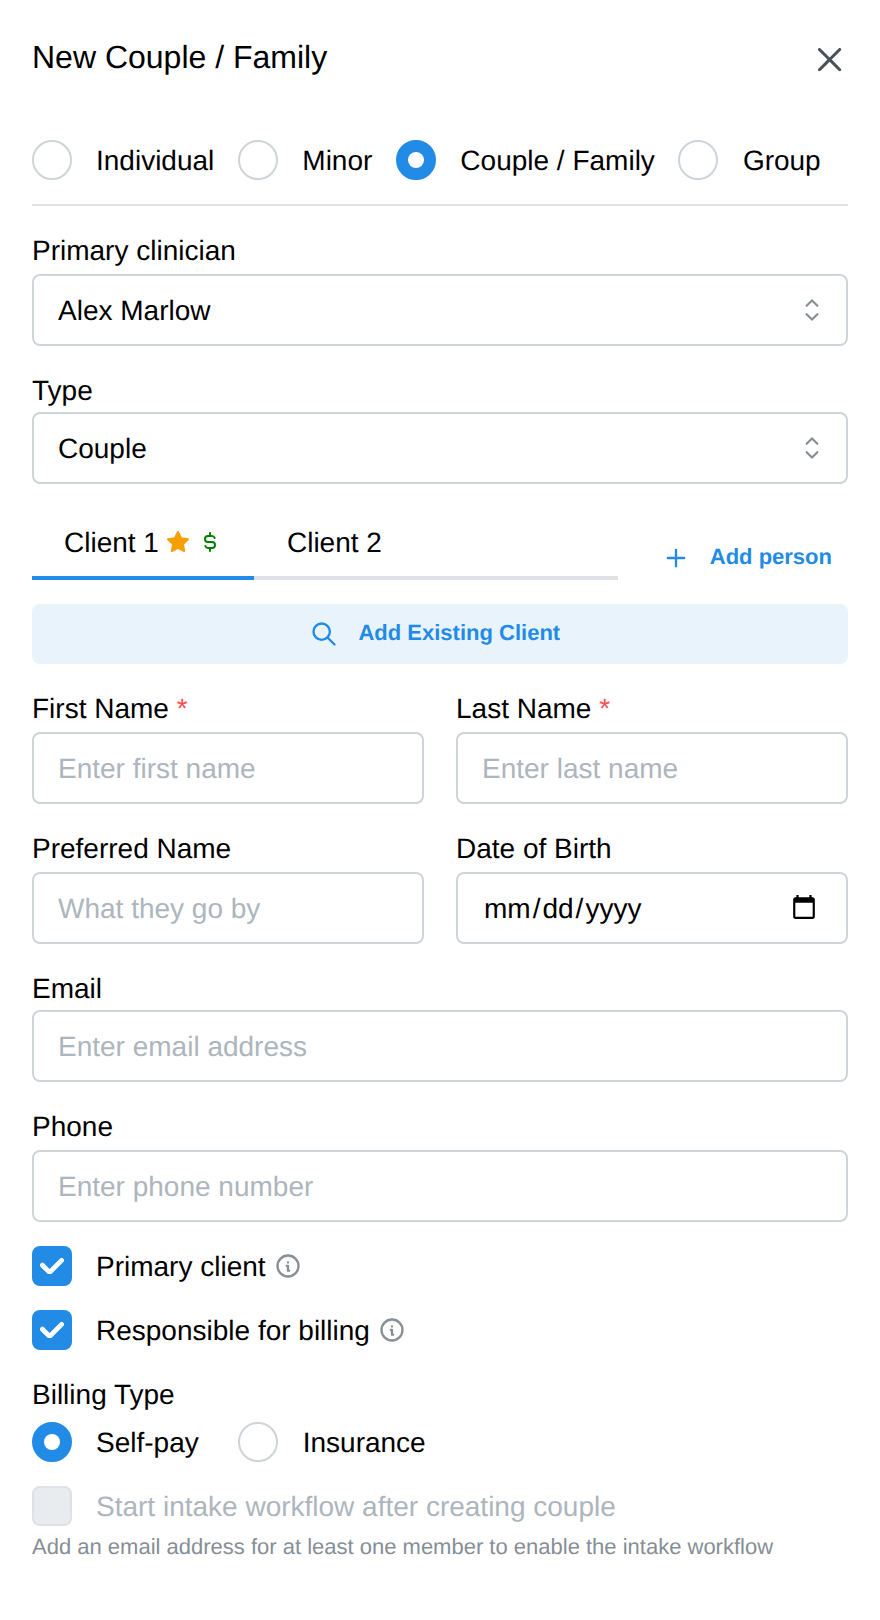
- Pick the group Type — Couple or Family
- A family can be any size from two people up — say a parent and child; adding a third person to a couple switches the type to Family automatically
- Fill in each member's tab
- For someone already in your practice, click Add Existing Client and search by name instead of retyping — they join the group under their existing record
- Tick Responsible for billing on the member who pays — they become the group's guarantor (marked with a dollar icon)
- Click Create Couple (or Create Family)
This creates the individual client records and the therapy group that appointments and notes attach to — see Couples & family therapy.
Sending intake paperwork as you create
With Start intake workflow checked, creating the client opens the three-step intake wizard:
- Select Documents — questionnaires, consent forms, scored measures, and the demographics form (whose answers save directly to the client's profile)
- Customize Email — the welcome message, plus whether to create their portal account
- Review & Send — click Send Intake; the client gets an email with instructions to access their forms
The checkbox is greyed out until two things exist: your client portal URL (one-time setup — the form links you to it) and an email on the client (for minors: on a guardian). You can always run it later from the Clients page: ⋮ → Start Intake Workflow. See Intake forms.
Finding and managing clients
The Clients page lists everyone — individuals plus couples and families (badged Couple/Family):
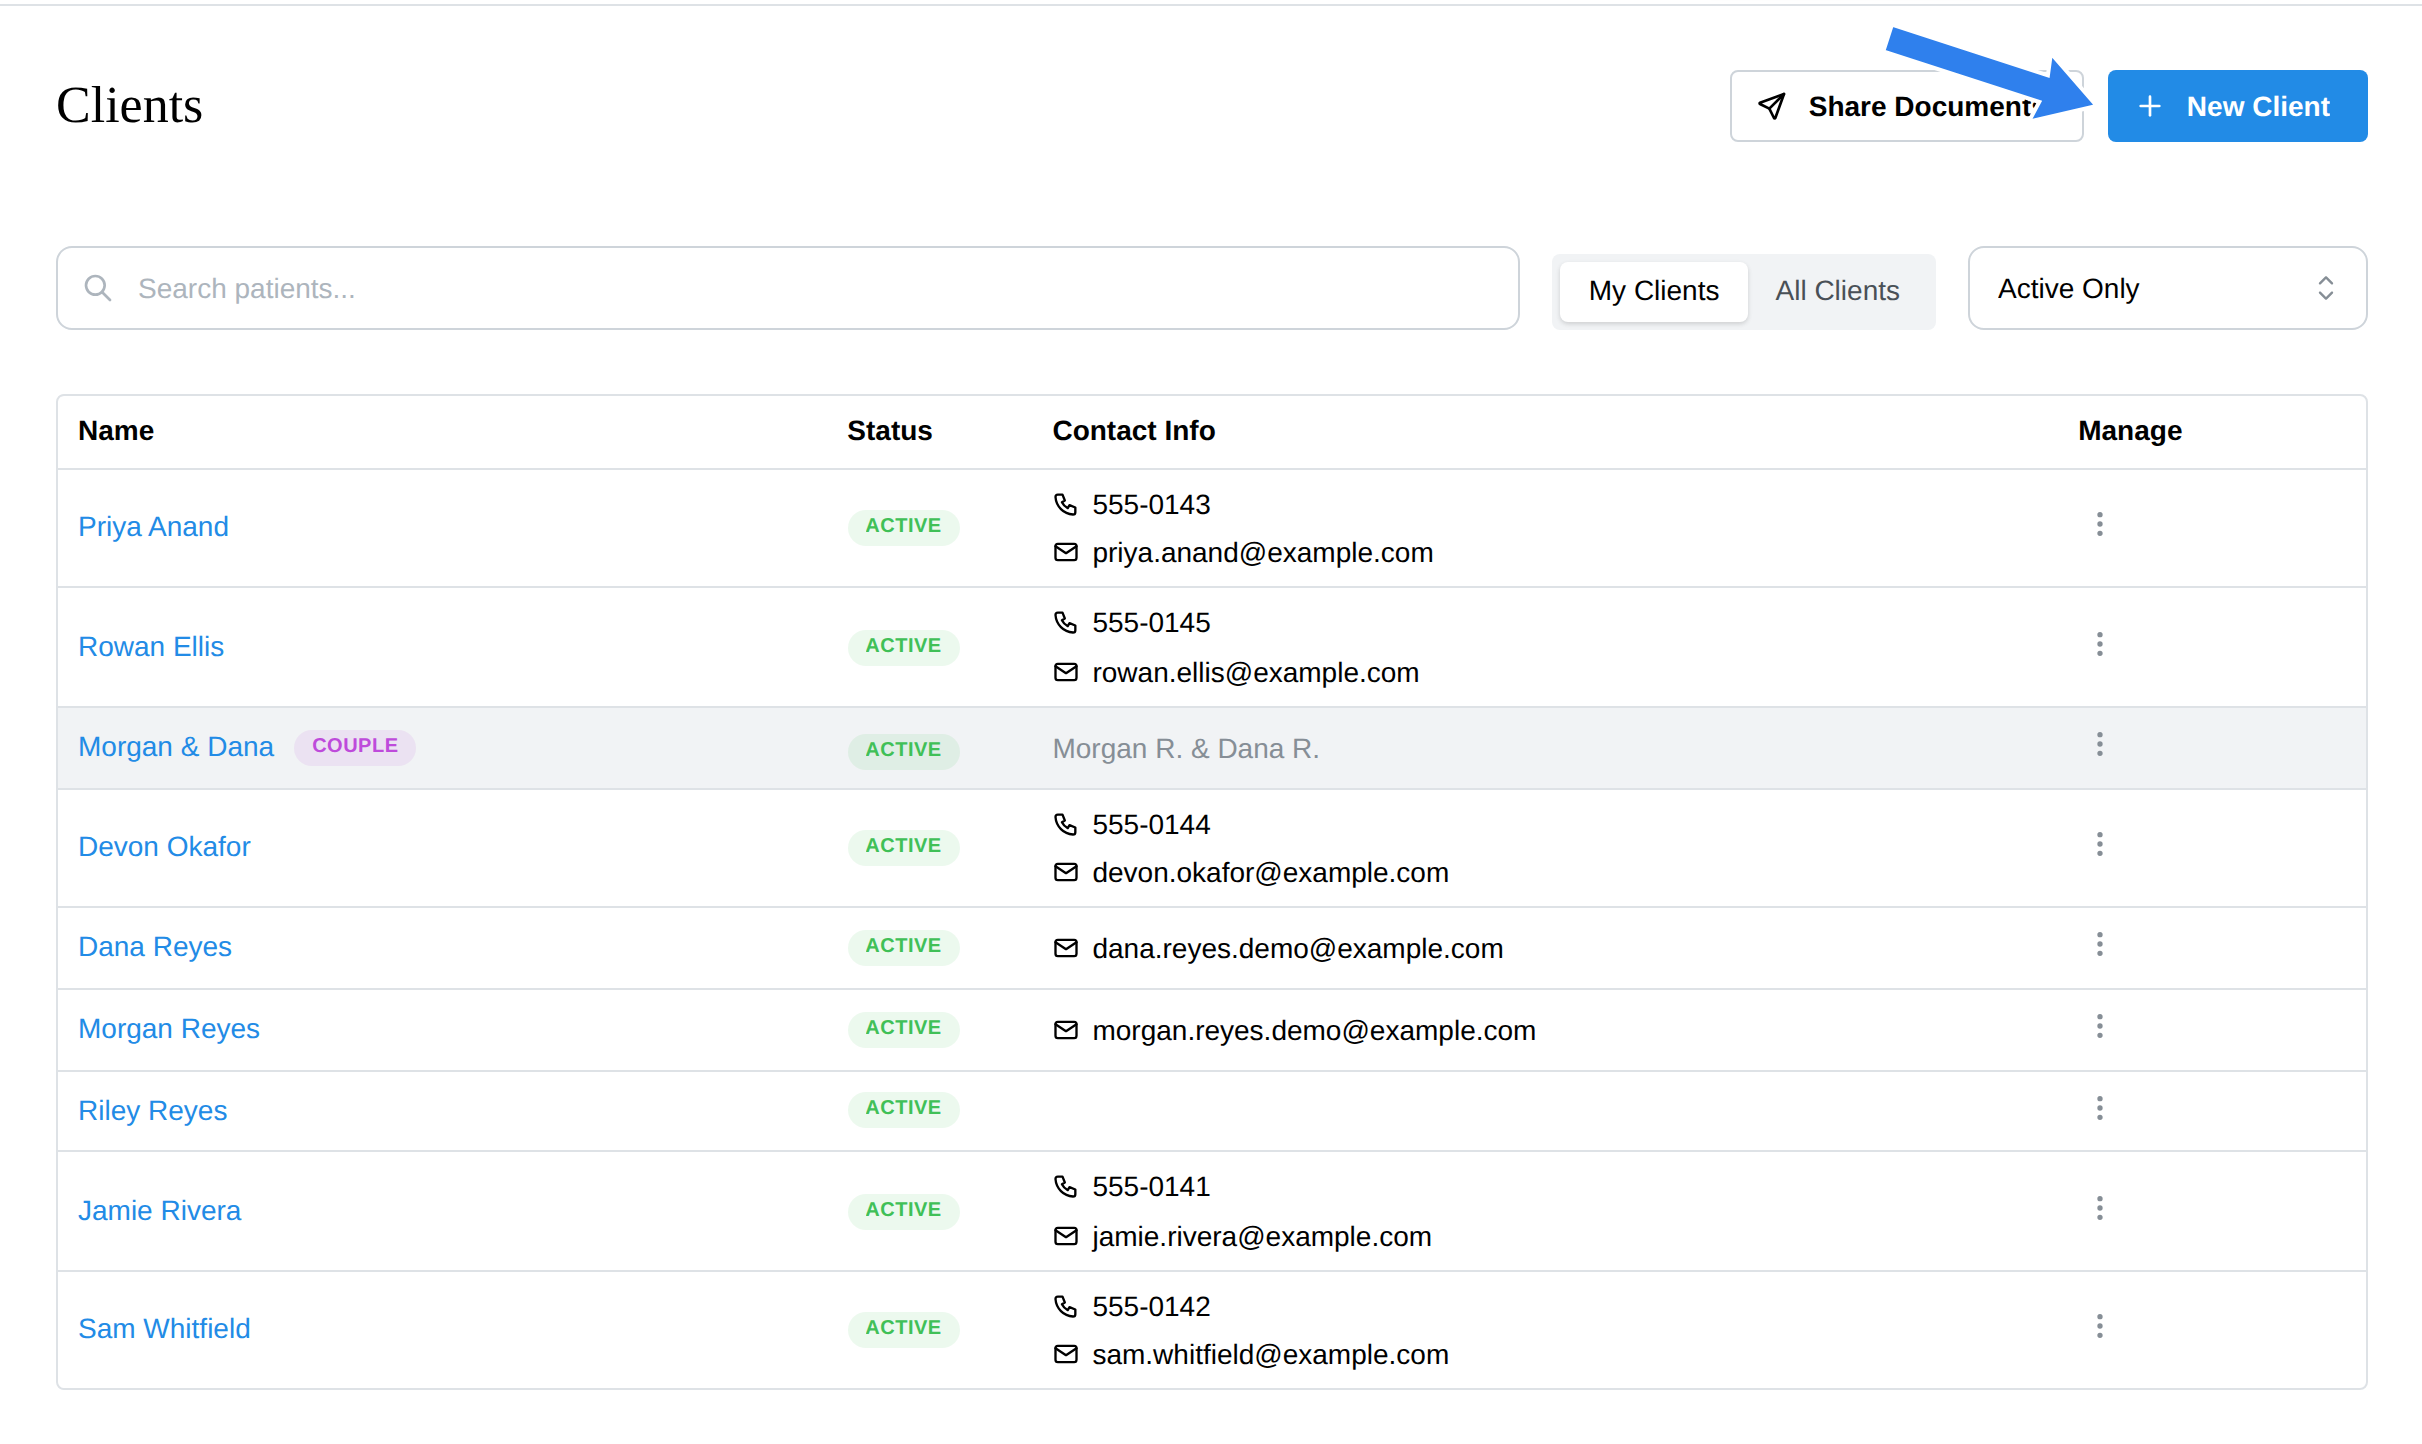
- Search by name; toggle My Clients (your caseload — the default) vs All Clients (practice-wide, subject to your access level); switch Active Only to Include Inactive to see former clients.
- Each row's ⋮ menu: View Profile, Start Intake Workflow, Change Provider (reassign the primary clinician), Make Inactive / Make Active, and Delete.
Inactive, not deleted, is the normal ending: marking a client inactive keeps their full record but removes them from day-to-day lists. Delete is for mistakes — it asks you to type DELETE to confirm, and clients with any clinical or billing history are refused ("This client has history and can't be deleted").
FAQ
Can I create a client while scheduling an appointment? Not currently — the appointment form only selects existing clients. Create the client first (it takes four fields), then book.
Why didn't my new client get a welcome email? Plain creation sends nothing — that's by design, so you control the moment of first contact. Run Start Intake Workflow (or check the box at creation) to send the welcome/portal email.
I created a client but don't see their profile. Creation returns you to where you were — find them via the Clients page or the search bar.
Someone's already in the system with that email. You're likely re-adding an existing client — search for them instead. For couples, use Add Existing Client so the group reuses their record.