Navigating your account
A two-minute map of the app. (Until you finish the interactive tutorial, the home page shows your onboarding progress; after that, the Calendar is home base.)
In this guide, we'll cover:
- The left navigation
- The top bar
- The three daily surfaces
- The Getting Started checklist
- The setup pills
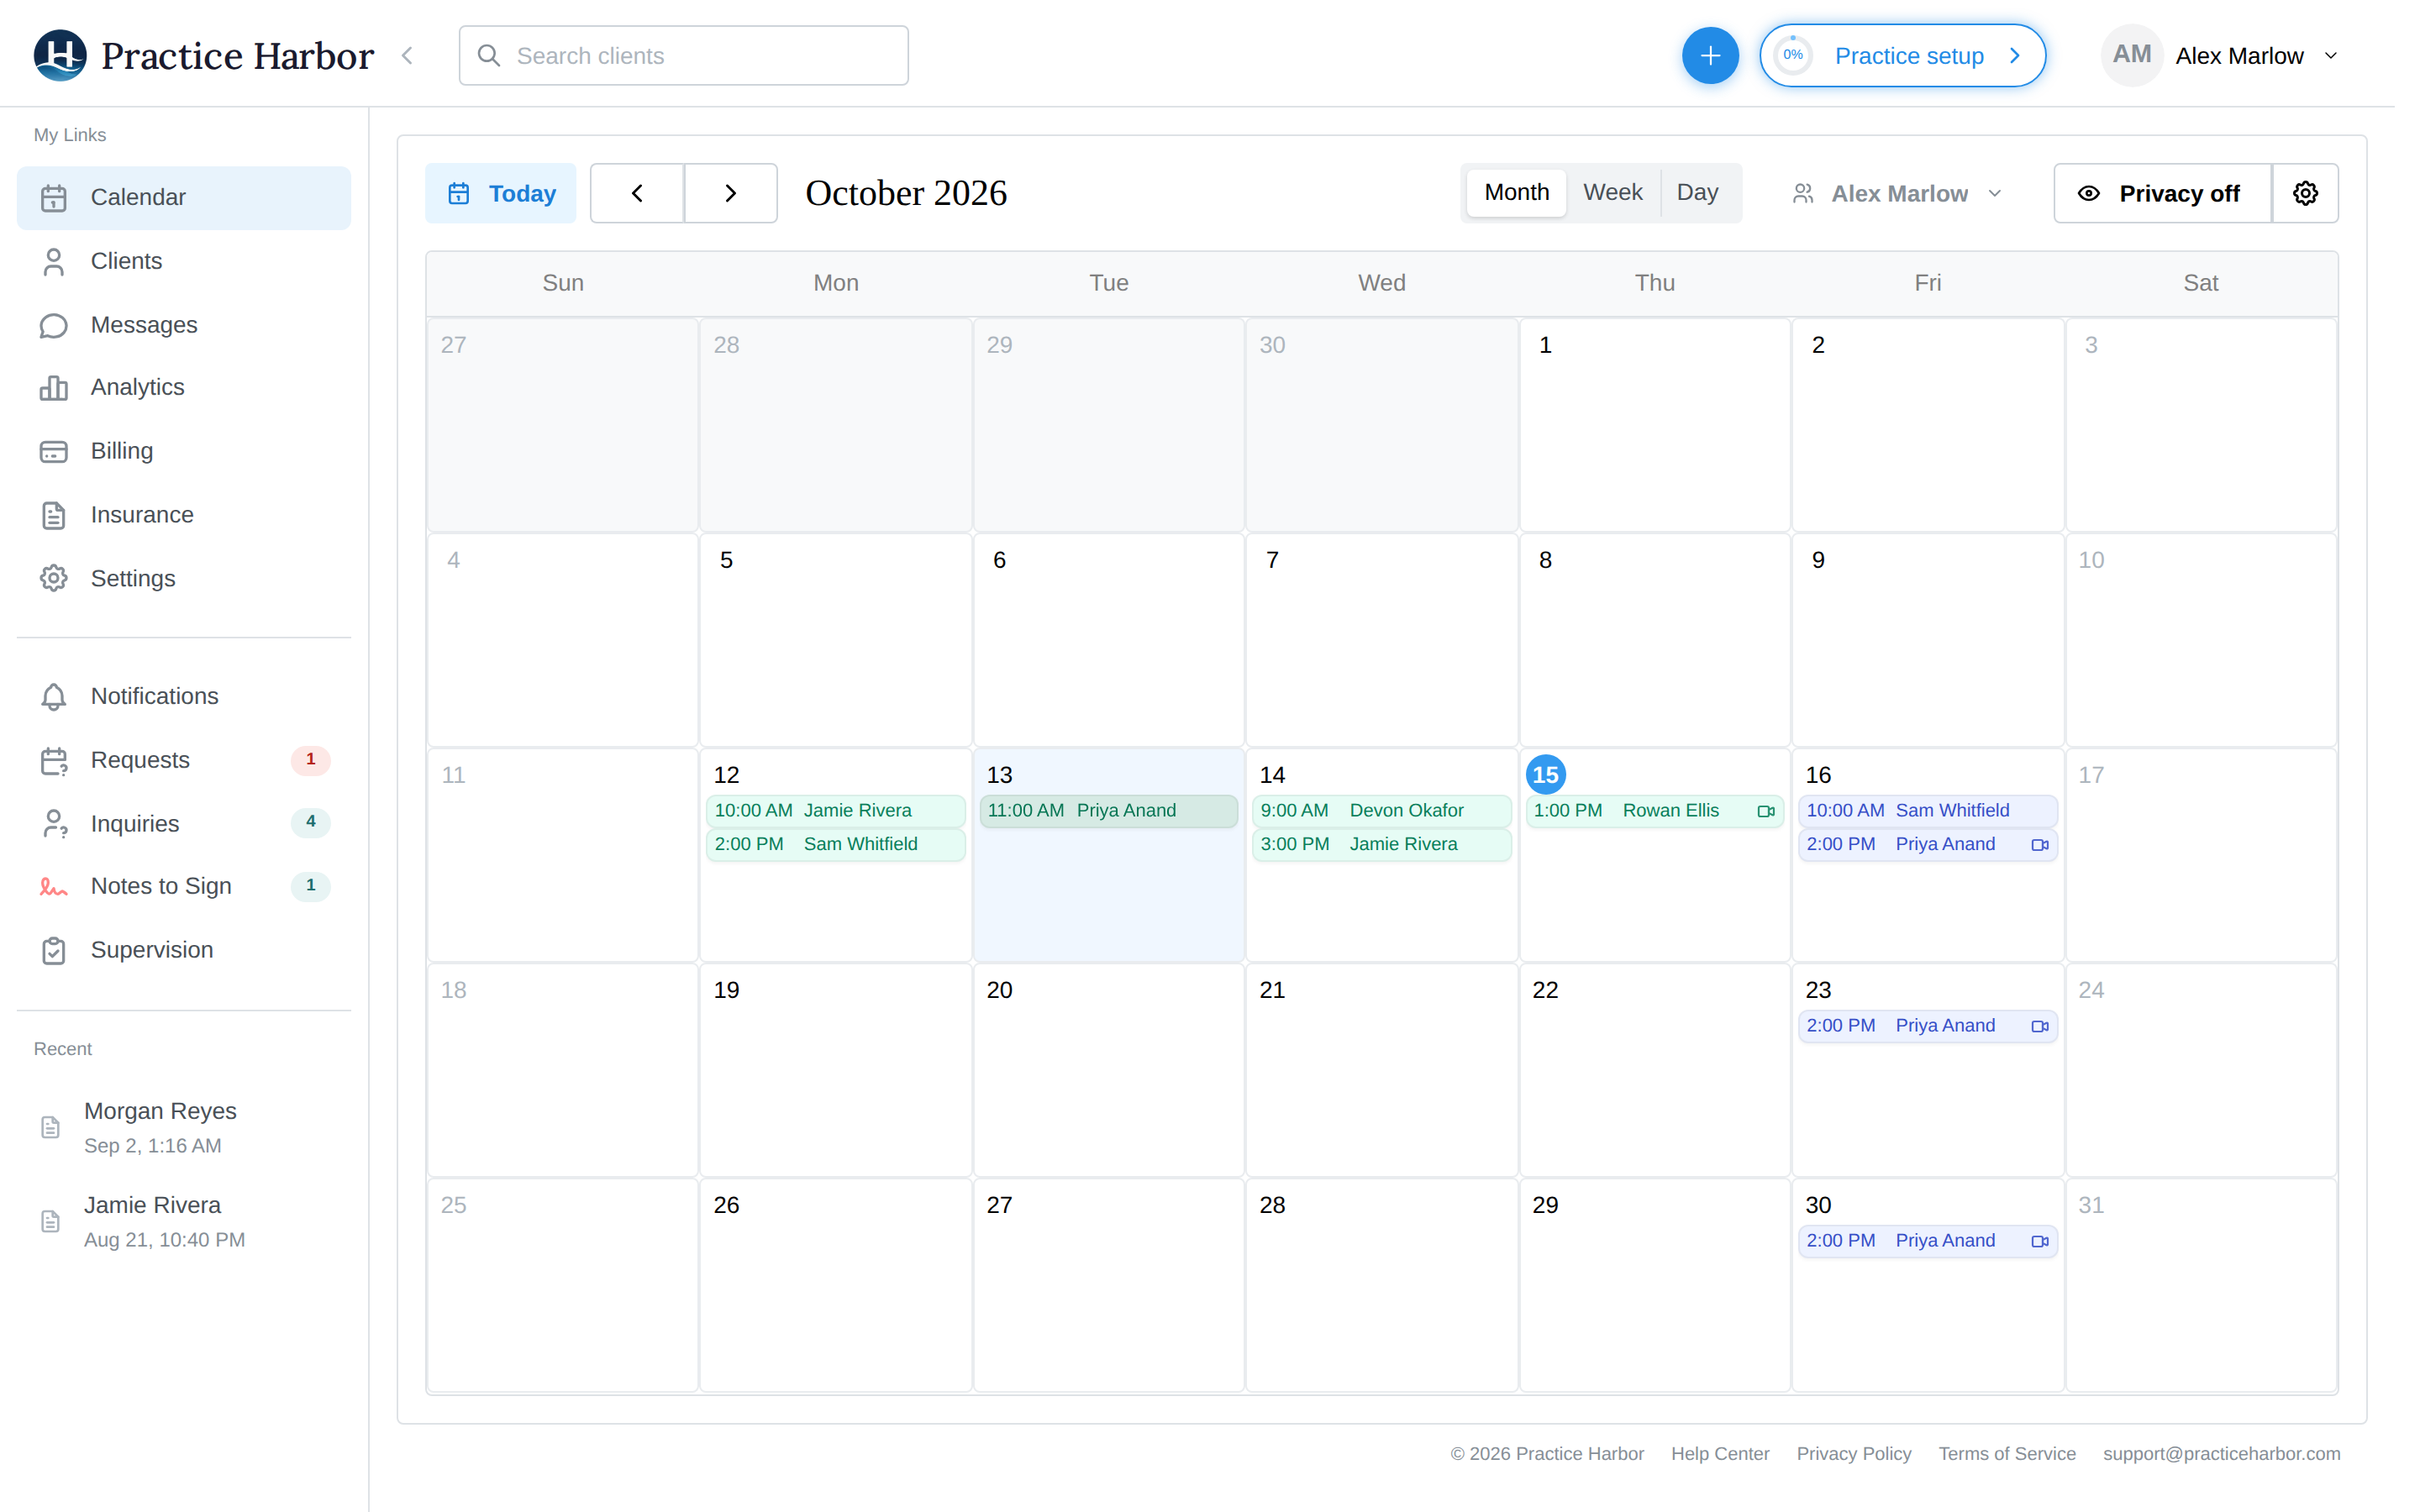
The left navigation
| Item | What lives there |
|---|---|
| Calendar | Your schedule — appointments, views, blocked time |
| Clients | Your caseload — client list and charts |
| Messages | Secure messaging with clients |
| Analytics | Practice metrics and reports |
| Billing | The Billing Dashboard — money across the whole practice |
| Insurance | The Insurance hub (appears once insurance features are enabled) |
| Clinical Hours | Appears for pre-licensed clinicians and supervisees: your clinical hours log |
| Settings | Everything configurable — see the Settings reference |
| Notifications | What needs someone's attention, with a count, grouped by Documentation and Insurance. Documentation: sessions from the last 90 days with no note, and treatment plans past their review date, for your own clients and your supervisees' (practice managers and clinicians who see the entire practice see everyone's); shown to every clinician. Insurance: rejected or denied claims and insurance payments that need a look; shown to practice owners, managers, billers, and clinicians with billing access. Several of one kind are combined into one line (for example "7 missing progress notes"); click it to see each one |
| Requests | Appointment requests from new and existing clients, with a count of pending ones |
| Inquiries | Prospective clients who contacted you, with a count |
| Notes to Sign | Your signature queue — unsigned notes and treatment-plan reviews, with a count |
| Supervision | For supervisors and supervisees: the supervision dashboard — review queue, hours, comments. When something is waiting, the item is renamed to what's waiting (Pending Review or Revisions Requested) |
| Recent | Shortcuts to pages you've used recently |
Roles change what you see: administrative roles don't get clinical areas (no Notes to Sign), and some items (Analytics, Billing, Insurance, and the Practice part of Settings) require the right access level. Click the ‹ arrow next to the logo to collapse the menu to icons.
The top bar
- Search clients — jump to any client from anywhere
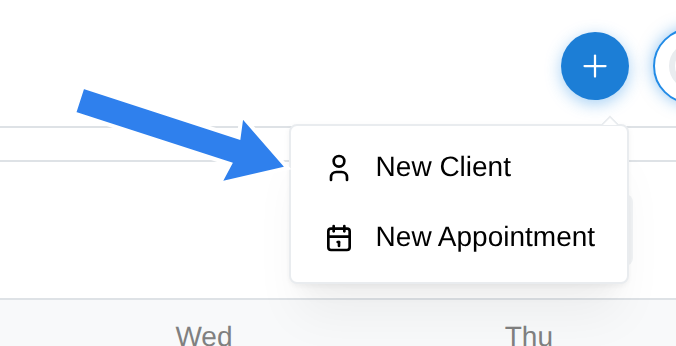
- + (quick add) — New Client and New Appointment from any page
- Practice setup — your practice-setup progress; disappears once you've finished (or click Finish Later inside it)
- Your name — profile shortcuts and sign out
The three daily surfaces
Most days are lived in three places: the Calendar (what's next), a client's chart (the session you're in), and Notes to Sign (what's left to finish). Everything else is weekly (Billing, Insurance) or occasional (Settings, Analytics).
The Getting Started checklist
For your first weeks, the calendar shows a Getting started panel that checks itself off as your practice comes to life — try the AI scribe (the tutorial), add your first client (the Add a client link walks you through the + button gesture you'll use every day), book a session, send an intake packet, finish practice setup, and — if you're switching from another EHR — bring your clients over. Every new practice also includes a Sample Client and a sample session on the calendar, safe to explore (hide or delete them anytime in Settings → Practice). A one-time Show me around tour points out where everything lives; the panel disappears on its own once your practice is up and running, or dismiss it with the ×.
The setup pills
Practice owners see a Practice setup progress pill in the top bar until the five setup steps are done — Practice, Credentials, Location, Practice Fee Schedule, and Online Payments — with a Finish Later escape hatch inside the wizard. Non-owner clinicians get their own Complete Profile pill covering their personal credentials instead.